How to batch remove backgrounds and export transparent PNGs on Windows
26.11.1006
Novaber · Content reviewed
On this page
Remove backgrounds from a batch of product photos or portraits. Choose BiRefNet, SAM3 or SAM2, check the edges, and export a ZIP with transparent PNGs.
These steps were checked against the published app's documented features. Confirm hardware requirements and model readiness using the app details and checks on your PC.
For NVIDIA GPU workflows, check driver major >= 575 and Windows driver >= 576.57 for the project’s CUDA 12.9.1 baseline. See the driver and CUDA baseline for version comparison, unknown results and container checks. Check the selected app’s GPU model, VRAM and model requirements separately.
Install and open Cutout & Watermark Removal from Novaber on Windows. Image processing runs in a local container. Sign-in, task authorization, the initial app image download, and on-demand model downloads require an internet connection.
Import your product photos into a batch image task. Start with a few representative shots, including any thin handles, holes or translucent edges. Keep the originals for comparison.
Choose automatic removal, a text prompt or point selection
Start with BiRefNet for automatic background removal when each product photo has a clear foreground subject.
When a photo contains different kinds of objects and you only want to keep one kind, name it in a SAM3 text prompt.
Use SAM2 points to mark a subject manually. Switch between the original and transparent preview to check edges and gaps before processing the rest of the batch.
Export a ZIP and verify PNG transparency
Export a ZIP when the cutouts are ready and extract the transparent PNGs. The masks identify which areas to keep or exclude. Use the transparent PNGs in your layouts.
Place a PNG against both light and dark backgrounds to inspect the edges. If you see leftover background, a halo or missing details, check the original preview and adjust that image.
Keep PNGs for later design work. When preparing images for another platform, follow the applicable material and software licenses and export in the required format.
Extract the ZIP, then open a PNG in an editor that supports alpha channels. A white or black preview does not necessarily mean that color is part of the image. Add a contrasting background layer and check that it shows through outside the subject.
If automatic removal is unsuitable, use SAM2 keep and exclusion points to specify the subject, or name the objects to retain in SAM3. Reprocess the affected image and check it before exporting.
Identify the workspace controls
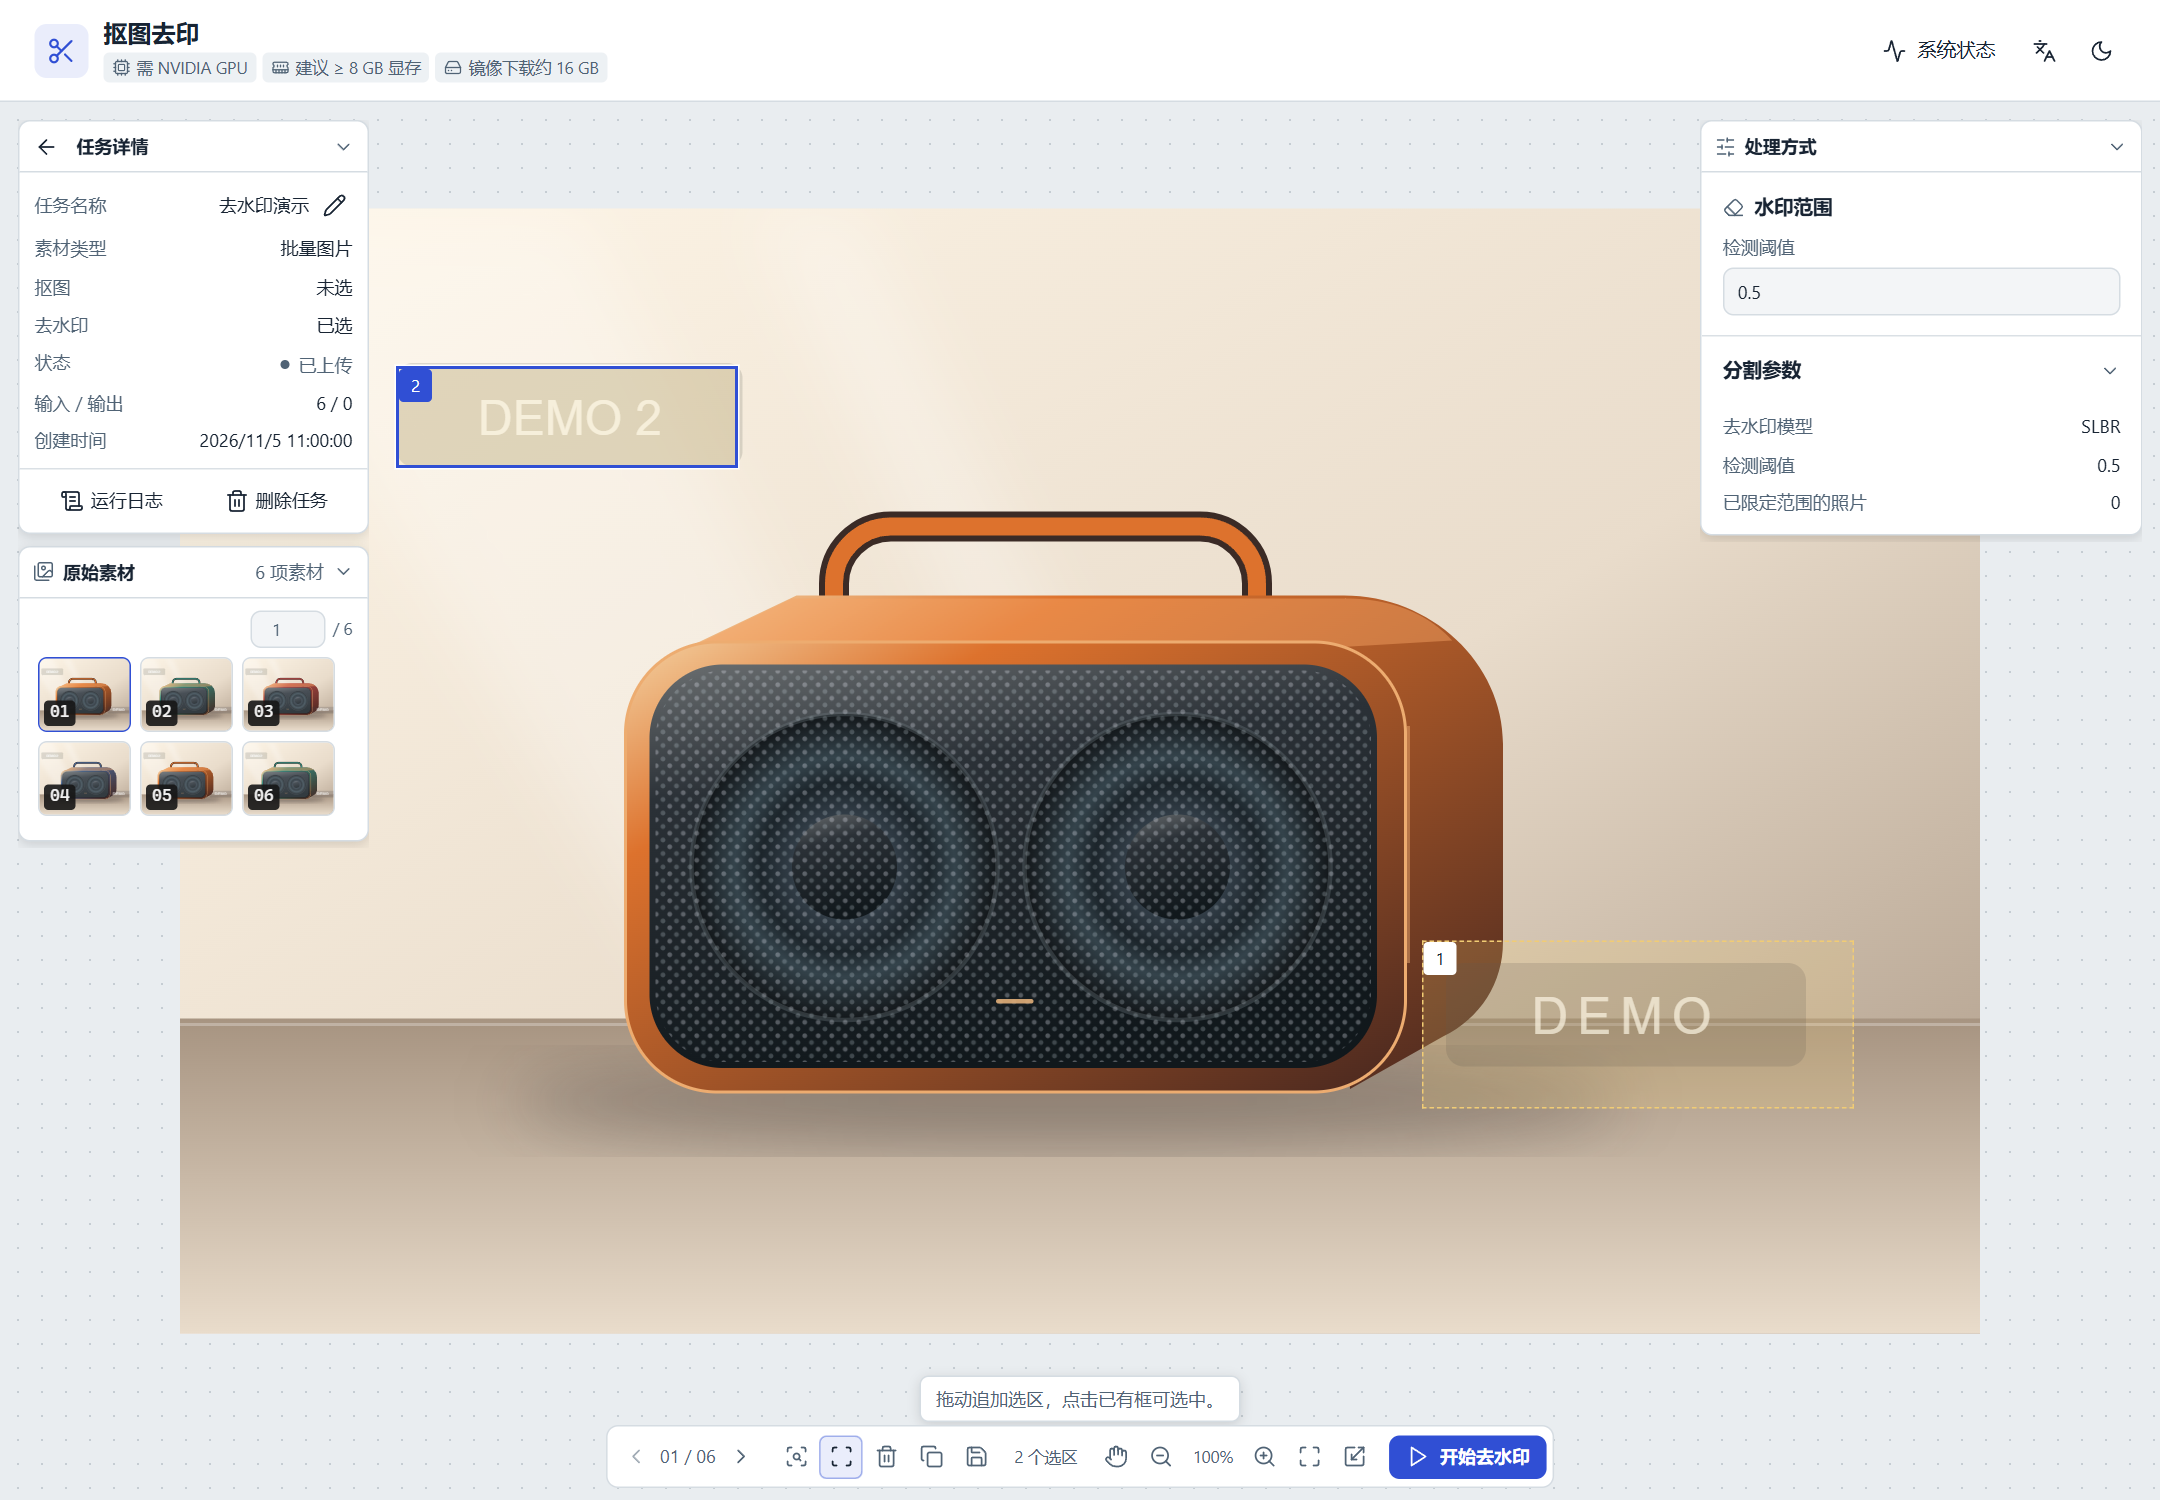
The screenshots identify watermark regions, subject prompts, and result comparison controls. Image batches can use background removal alone. Combined processing restores watermarks before segmenting the subjects.
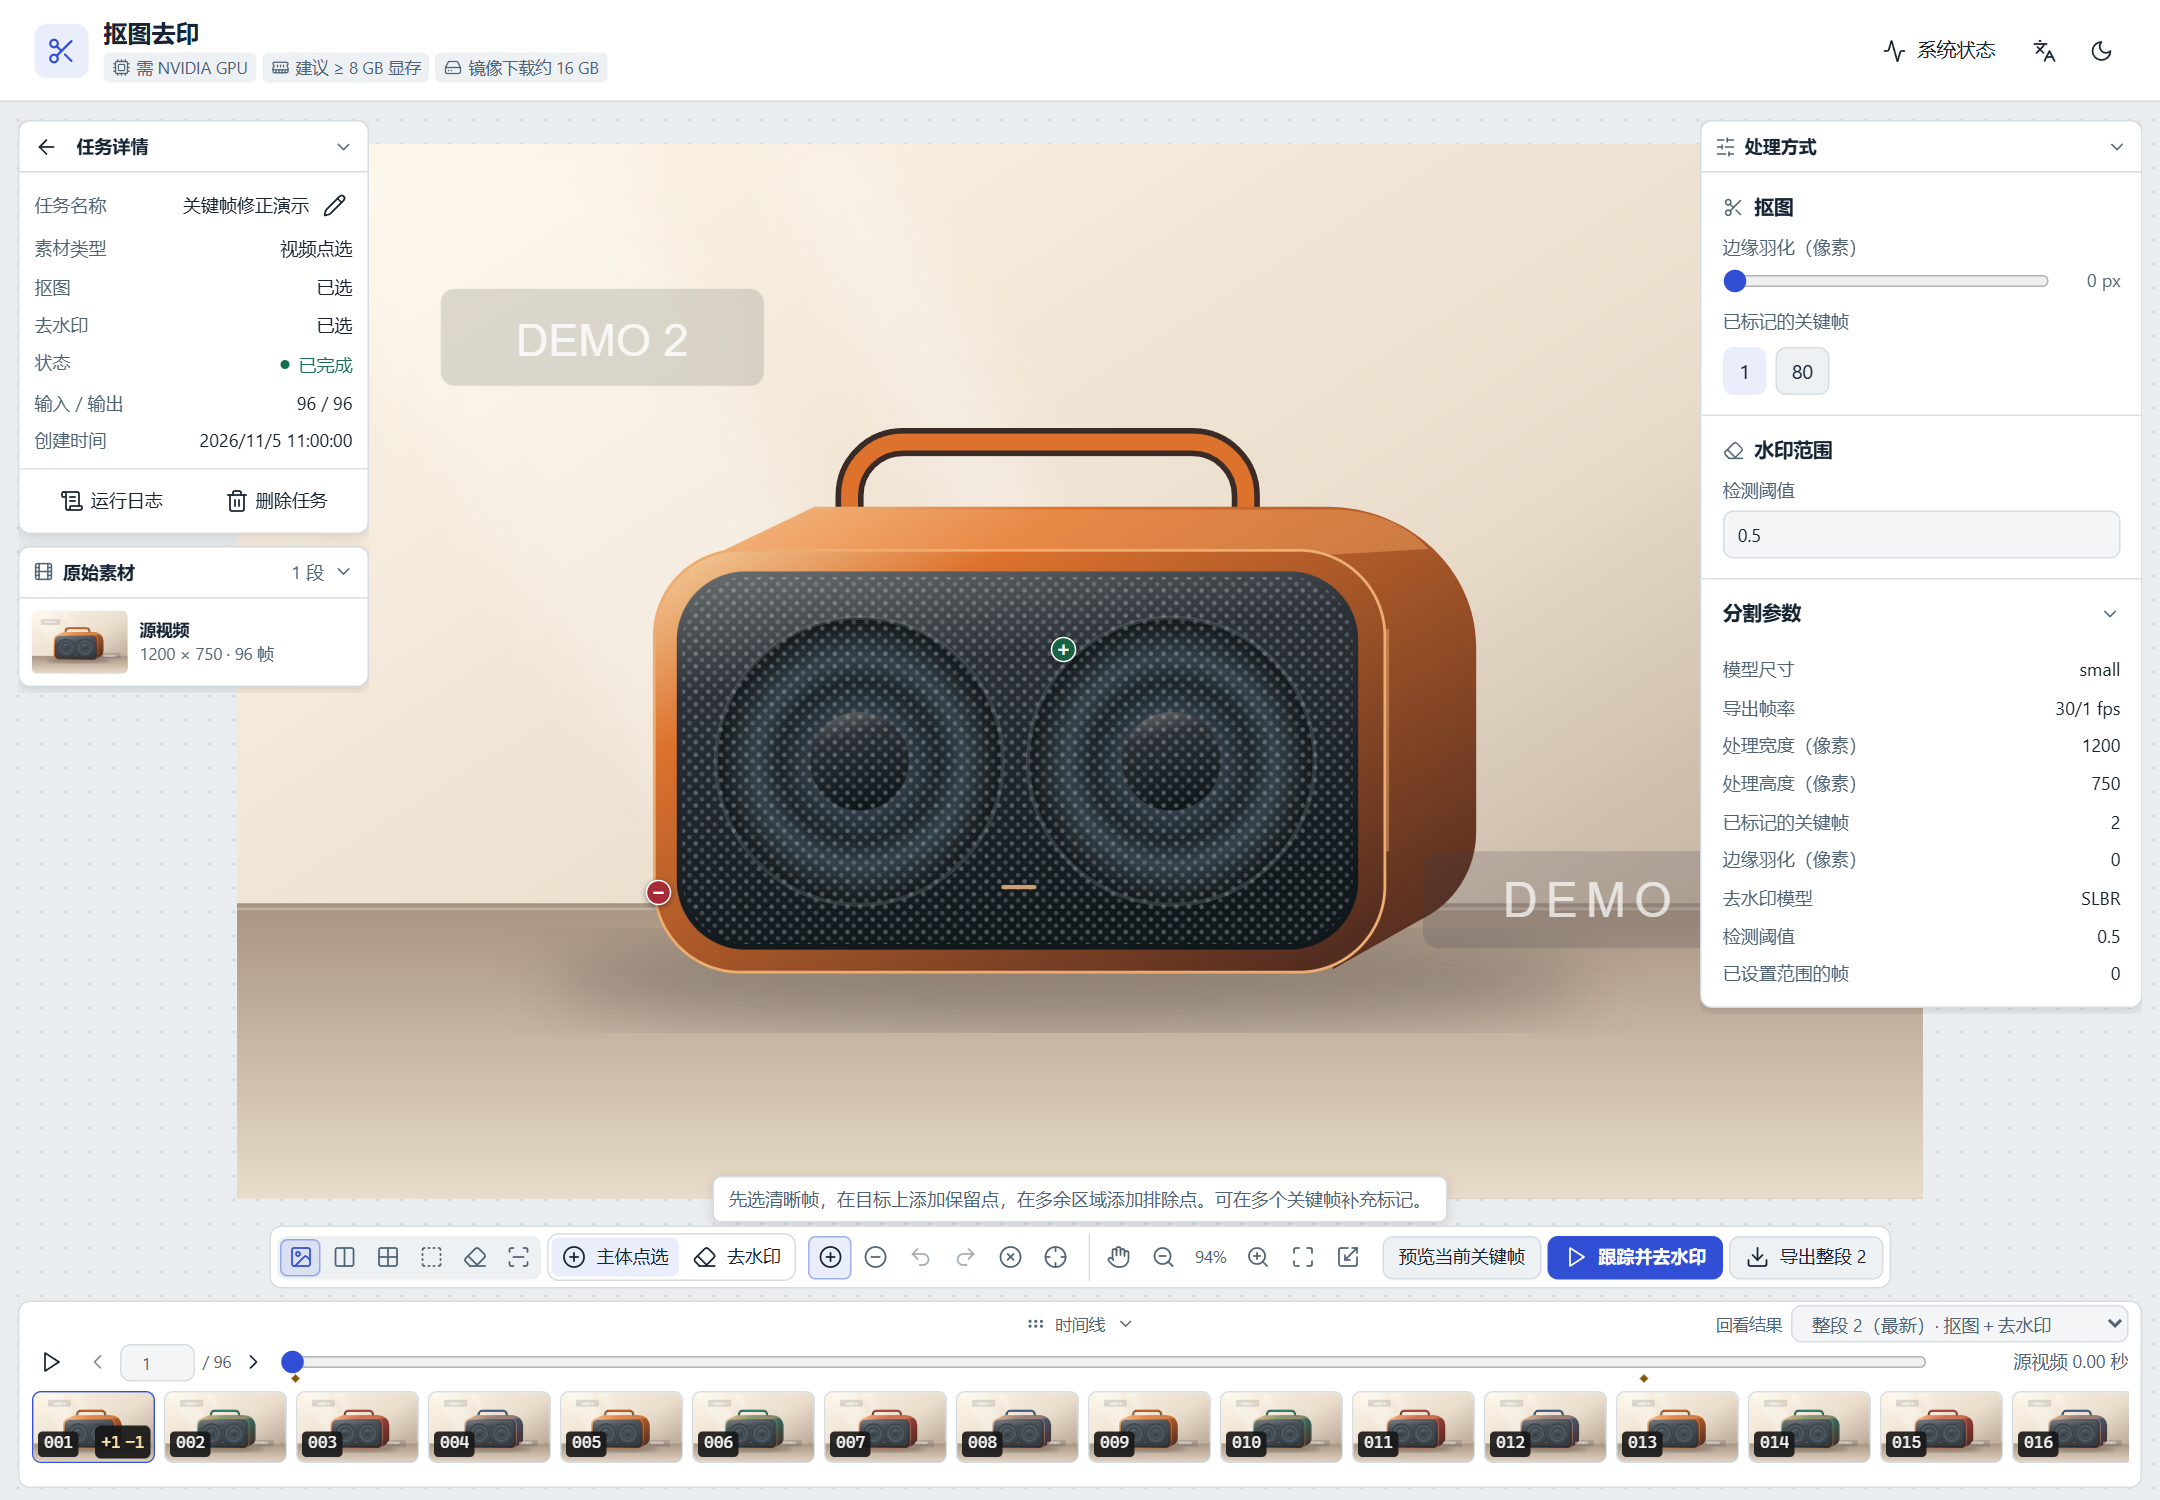
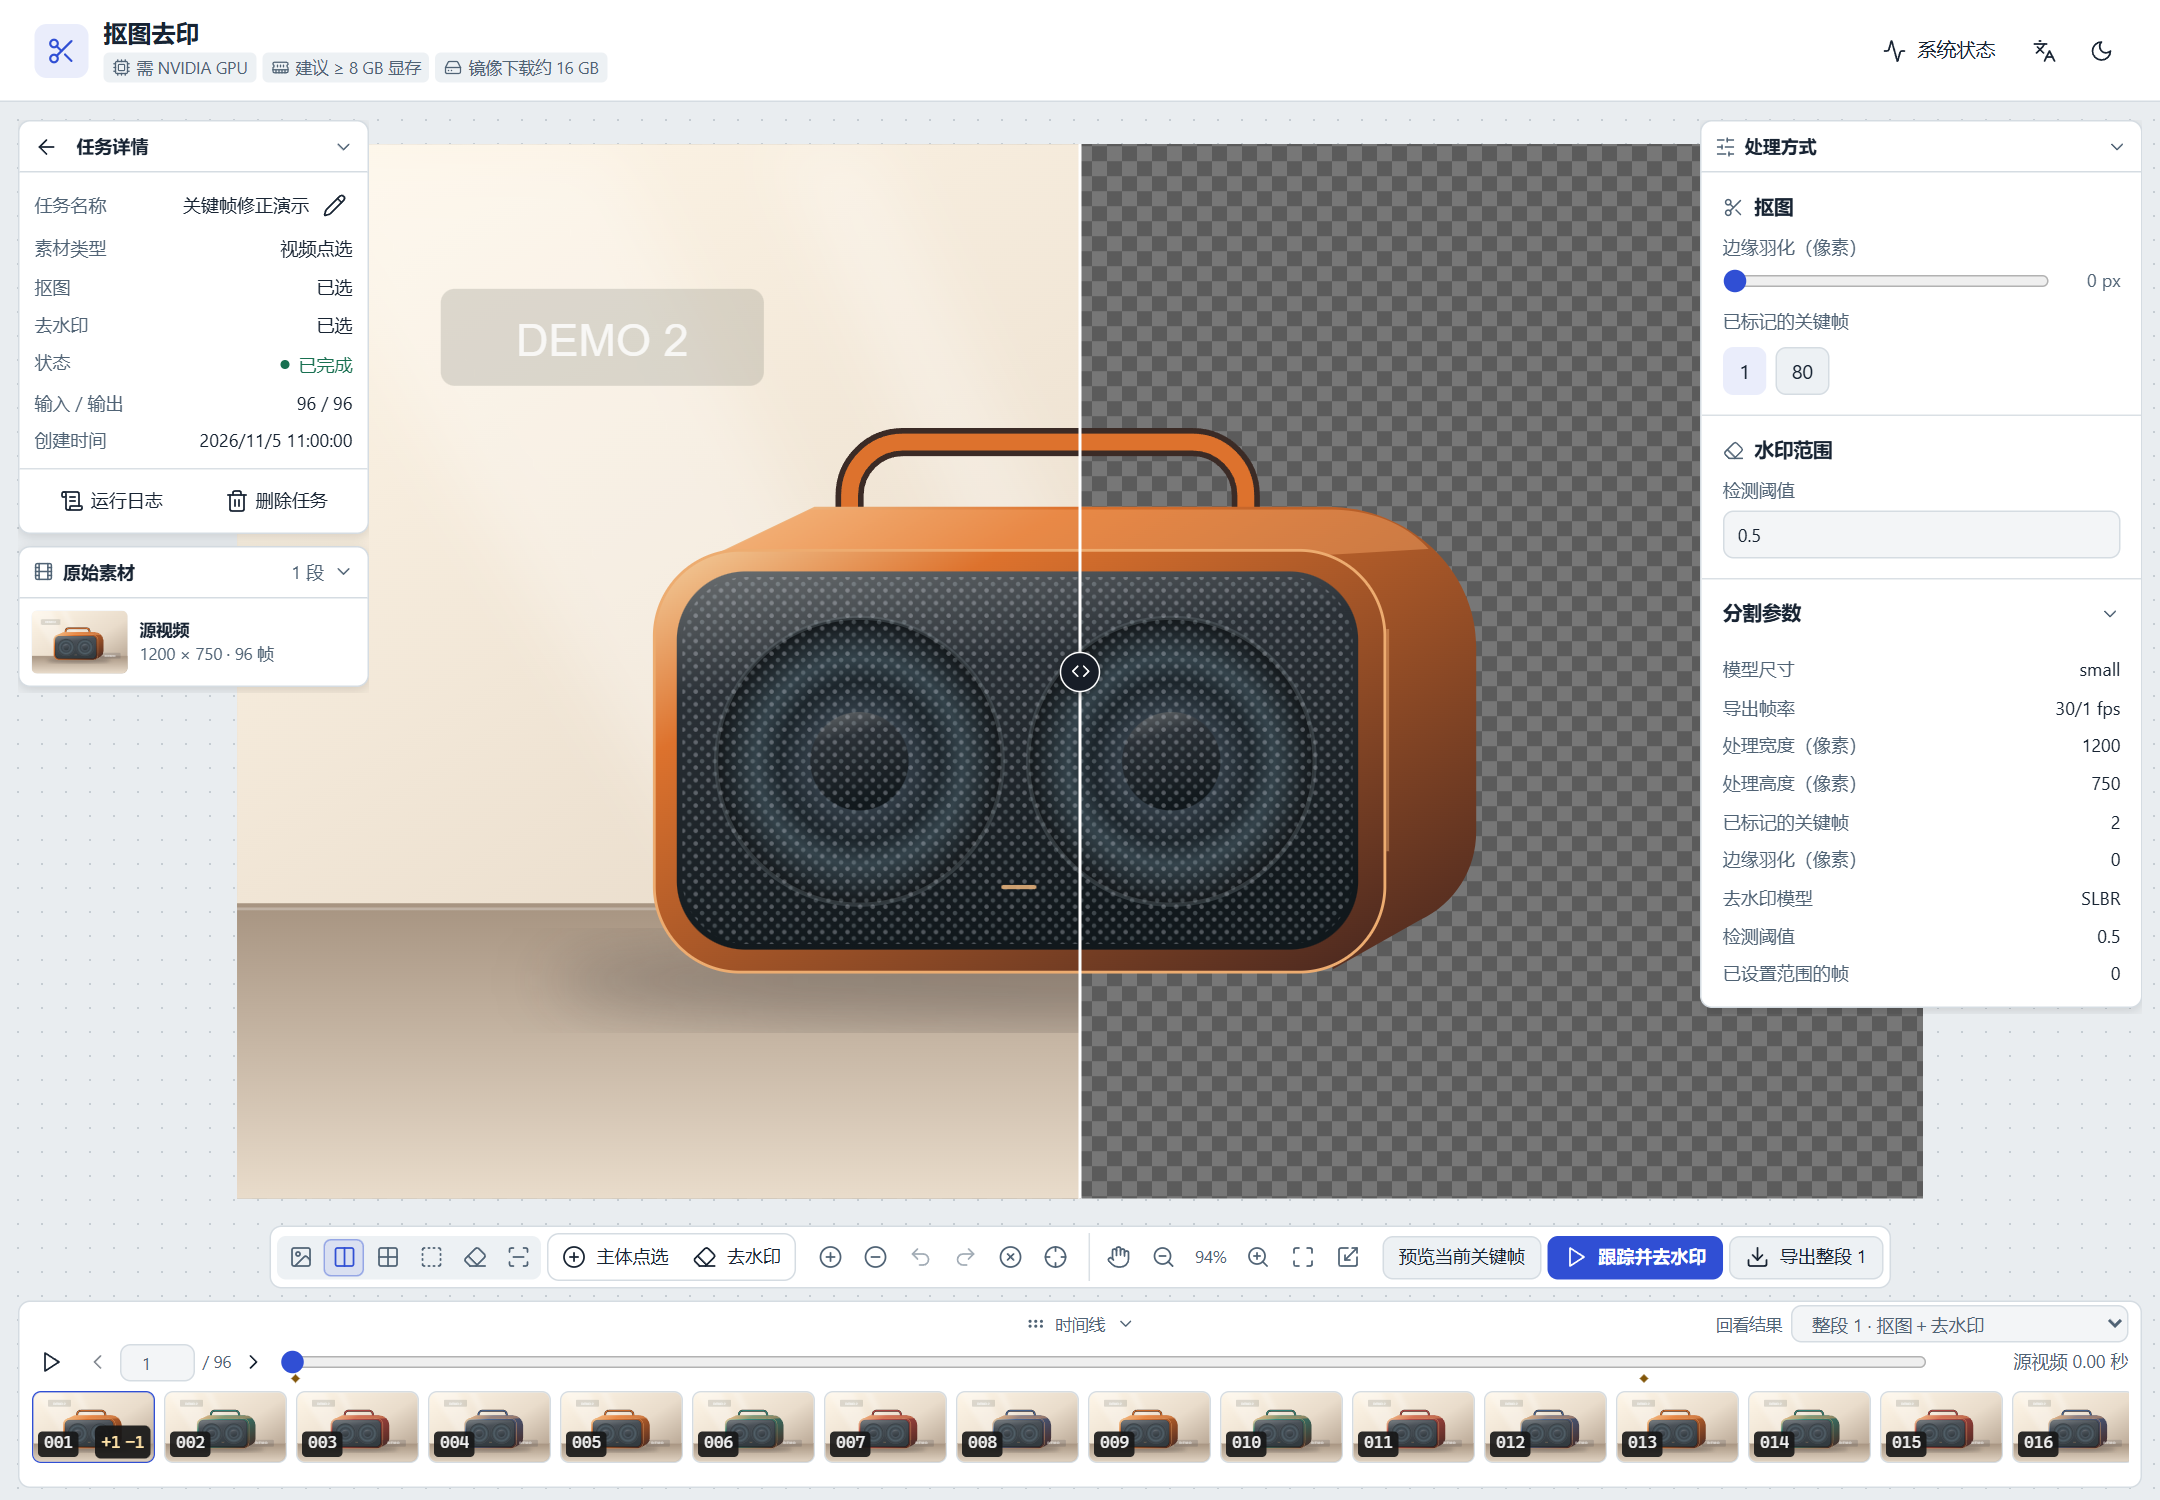
The keyframe and historical-version screenshots show video and image-sequence workflows. For an ordinary image batch, follow the image steps above; you do not need a video task or whole-sequence versions.
About these screenshots
These Chinese-language screenshots show the rendered interface of Cutout & Watermark Removal 26.11.1006. The speaker media and results are synthetic demonstrations of the controls, not measured model output. Keyframes and historical versions apply to video and image sequences, not ordinary image batches.
Image batches · Mark separate watermark regions when restoration is needed first. The blue border indicates the selected region. Watermark removal is optional for background-only tasks.
Video and image sequences · Keep points identify the subject; exclusion points remove unwanted areas. Check the current keyframe preview before processing the whole sequence. This screenshot shows the video workflow.
Video and image sequences · Compare the original and result to inspect edges and watermark regions. Export should match the selected whole-sequence version. The pictured result is a demonstration preset.